• Skip to primary navigation
  • Skip to main content

My Millennial Kitchen logo

  • About
  • Recipes
  • Travel
  • Blog
  • Subscribe
menu icon
go to homepage
  • About
  • Recipes
  • Travel
  • Blog
  • Subscribe
    • Email
    • Instagram
    • Pinterest
  • subscribe
    search icon
    Homepage link
    • About
    • Recipes
    • Travel
    • Blog
    • Subscribe
    • Email
    • Instagram
    • Pinterest
  • ×

    Home

    Pumpkin Snickerdoodles

    October 4, 2018

    An orange cookie with a bite taken out of it resting on a baking rack.

    These pumpkin snickerdoodles are the greatest fall cookie recipe - ever! Each pumpkin snickerdoodle cookie is super soft and full of real pumpkin. Yes, real pumpkin! Together pumpkin puree and pumpkin spice form a super power of deliciousness in the form of chewy pumpkin snickerdoodles!

    An orange cookie with a bite taken out of it resting on a baking rack.

    This post contains Amazon affiliate links. If you buy any items through my Amazon affiliate links, I get a small commission on the sale.*

    These pumpkin snickerdoodles are super easy to whip up in a stand mixer or hand mixer. Just mix the ingredients together, chill the dough in the refrigerator, roll in pumpkin spice sugar coating, and bake! Fresh out of the oven, these pumpkin snickerdoodles smell incredible, wafting pumpkin spice smells through the air.

    Image collage demonstrating the four steps to make cookies.

    My favorite thing about these pumpkin snickerdoodles are their large size. Big cookies mean big bites, which really enhance the soft and chewy cookie texture. Having real pumpkin puree in this recipe also helps keep these snickerdoodle cookies nice and moist, even a few days after baking!

    Orange cookies dusted with cinnamon resting on a baking rack.

    Recipe Tips

    Get 100% Pure Pumpkin Puree

    • Make sure you get a can of pure pumpkin puree, not the canned pumpkin pie filling! Canned pumpkin pie filling has the pumpkin puree and pumpkin pie spices, too. At the store, the pumpkin pie filling cans are usually right next to the pure pumpkin puree cans, so you have to make sure to read the labels before adding to your cart.

    Chilling the Dough

    • Refrigerating the dough before shaping into balls helps the dough better solidify and stick together. When you are ready to refrigerate the dough, make sure you spread the dough out as flat as you can on a plate so it can chill evenly through. Your dough should look more like a thick pancake than a mound!
    • If you find the dough is still too sticky to roll into balls after refrigerating, pop the dough back into the refrigerator for 30-60 more minutes. Also, wipe your hands after shaping every 2nd or 3rd ball, having residual dough on your hands makes the dough stick to your hands more!
    • Don't have a ton of time to wait for your snickerdoodle dough to chill? Put the cookie dough in the freezer and they'll chill in half the time!

    A tall stack of cookies with the top cookie having a bite taken out of it.

    DON'T HAVE PUMPKIN SPICE ON HAND?

    Swap the pumpkin spice seasoning with cinnamon! Cinnamon in large amounts can be bitter, so if you are swapping cinnamon for the pumpkin spice, add a little less than the recipe calls for.

    ARE THESE COOKIES HEALTHY?

    While these snickerdoodles do have butter and sugar, I added just enough of each to still give great flavor and texture without going overboard. However, the health highlight of this recipe is with the real pumpkin puree. Pumpkin puree is a great way to enjoy all the health benefits of pumpkin without having to wrangle, chop, and cook a real pumpkin.

    One cup of pumpkin puree gives you 763% of your daily vitamin A needs, 49% of your daily Vitamin K needs, and 7g of fiber. The pumpkin puree in these pumpkin snickerdoodles give each each cookie 1g of fiber and 39% vitamin A. In your body, vitamin A plays an important role in supporting and protecting your immune system, eyesight, and red blood cells.

    WHAT MAKES THESE COOKIES SOFT?

    The soft and fluffy snickerdoodle texture comes from the moist pumpkin puree and the action of cream of tartar and baking soda. The acidic action of both cream of tartar and baking soda gives these snickerdoodles volume and a soft, chewy texture.

    Two hands breaking open a soft cookie against a white background.

    HOW LONG CAN I REFRIGERATE THE DOUGH BEFORE BAKING?

    When properly sealed and stored, the pumpkin snickerdoodle dough can be refrigerated for up to three days.

    CAN YOU FREEZE THE COOKIE DOUGH FOR LATER?

    Yes, you can freeze the cookie dough for up to three months. When you are ready to use your frozen pumpkin snickerdoodle dough, let thaw in the refrigerator before shaping into balls, rolling in the sugar and spice coating, and baking.

    HOW TO STORE LEFTOVERS

    First of all, I doubt you'll have any leftovers! But in the off chance that you do, seal any leftover cookies at room temperature in an airtight container.

    COCKTAIL PAIRING RECOMMENDATION

    These pumpkin snickerdoodles are best paired with a milk or creamy cocktail, like a spiked eggnog or white Russian.

    RECIPES YOU'D ALSO LIKE: Semi-Homemade Pumpkin Pie Trifle  /  Port Poached Pears  /  Breakfast Pumpkin Spice Mug Cake

    A stack of cookies with a hand grabbing for the top cookie that has a bite taken out of it.

    Shop My Exact Recipe Ingredients

    – Amazon Affiliate Links –

    Pumpkin Spice  /  Unbleached White Flour  /  Pumpkin Puree  /  Heavy Duty Foil

    If you made these pumpkin snickerdoodles, let me know in the comments section below or tag me on Instagram @mymillennialkitchen. I would love to see your fresh baked cookies, comments, or recipe questions!

    Print

    Pumpkin Snickerdoodles

    An orange cookie with a bite taken out of it resting on a baking rack.
    Pin Recipe
    Print Recipe

    ★★★★★

    5 from 1 reviews

    Pumpkin snickerdoodles are a fall cookie favorite! These soft and chewy pumpkin spice cookies are so easy to make, you'll be whipping them up in no time!

    • Author: Michele Sidorenkov, RDN
    • Prep Time: 10 minutes
    • Cook Time: 25 minutes
    • Total Time: 35 minutes
    • Yield: 15 cookies 1x
    • Category: Cookies
    • Method: Baking
    • Cuisine: Dessert

    Ingredients

    Scale

    ⅔ cup unsalted butter, softened

    1 cup sugar

    1 egg, room temperature

    2 teaspoons vanilla extract

    2 cups white all purpose flour

    1 teaspoon cream of tartar

    1 teaspoon baking soda

    ⅛ teaspoon salt

    ⅔ cup plain pumpkin puree (look for plain pumpkin puree, not the pumpkin pie filling)

    For the snickerdoodle coating:

    2 tablespoons pumpkin spice

    2 tablespoons sugar

    Instructions

    1. Using a stand mixer or hand mixer, cream together the butter and sugar on medium/high speed for about 2-3 minutes. Reduce the speed to medium and add the egg and vanilla extract, and continue mixing for 1 minute.
    2. Stop the mixer and add flour, cream of tartar, baking soda, salt, and pumpkin purée, then continue to mix on medium speed for 30 seconds or until well combined.
    3. Transfer the pumpkin cookie dough to a plate and loosely shape the dough so it's flat, about 1.5-2 inches thick all around. Cover and chill for one hour in the refrigerator (see note 1).
    4. While the dough chills, preheat the oven to 350ºF and cover a baking sheet with tinfoil. Prepare the pumpkin snickerdoodle coating by mixing the pumpkin spice with the remaining sugar and transfer to a large plate.
    5. Roll the dough into golf ball sized pieces, then roll each dough ball into the pumpkin spice and sugar mixture until evenly coated on all sides. Bake for 15 minutes and allow to cool on the baking sheet before enjoying.

    Notes

    • Note 1: After mixing, the dough can be really sticky. Refrigerating the dough helps the dough solidify so it won't stick to your hands when shaping. If the cookie dough starts to stick to your hands when you are rolling and shaping the dough, rinse your hands between every 2-3 cookie rolls.  Don't have an hour to chill your dough? Stick it in the freezer to chill in half the time.
    • Right out of the oven, these pumpkin snickerdoodles will have an extra soft and airy texture but as they cool, these cookies will get more sturdy.
    • When properly sealed and stored, the pumpkin snickerdoodle dough can be refrigerated for up to three days before baking.
    • The pumpkin snickerdoodle cookie dough can be stored in the freezer for up to three months. When you are ready to use your frozen pumpkin snickerdoodle dough, let thaw in the refrigerator before shaping into balls, rolling in the sugar and spice coating, and baking.
    • Seal any leftover baked cookies at room temperature in an airtight container.

    Nutrition

    • Serving Size: 1 Pumpkin Snickerdoodle
    • Calories: 190
    • Sugar: 14 g
    • Sodium: 104 mg
    • Fat: 8 g
    • Saturated Fat: 5 g
    • Unsaturated Fat: 3 g
    • Trans Fat: 0 g
    • Carbohydrates: 27 g
    • Fiber: 1 g
    • Protein: 2 g
    • Cholesterol: 34 mg

    Keywords: Pumpkin Snickerdoodles

    Did you make this recipe?

    Tag @mymillennialkitchen on Instagram or leave a comment and rating below!

    How to Drink Icewine | 5 Easy Steps

    September 30, 2018

    Overhead image of someone holding a glass of icewine resting on a wood table.

    When it comes to drinking icewine, there are a few rules most of which go against traditional wine tasting recommendations. Following the proper sipping techniques will open up the flavors of the icewine and cut the sweetness so you can really enjoy its complexities.

    After going on an icewine tasting in Niagara Falls, I learned the proper sipping techniques that actually work. Learning how to drink icewine has completely changed my view of icewine and I hope it opens up your palate, too!

    [feast_advanced_jump_to]

    OTHER POSTS YOU'LL LOVE: The Ultimate Wine Pairing: Rose Champagne // The Best Summer Wine That's Under $20 // Wine Archive

    Overhead image of someone holding a glass of icewine resting on a wood table.
    Bundle of green and purple icewine grapes on the vine.

    How to serve icewine

    You can enjoy icewine any time of year and pair it with both sweet and savor foods. Before we get into the exact icewine sipping technique, there are a few important elements that need to be discussed:

    • Temperature: The perfect icewine serving temperature is 50ºF (10ºC) and the bottle should be thoroughly chilled before serving.
    • Icewine glass shape: Icewine should be poured into a medium to small sized glass, like a sparkling wine flute or a white wine glass - not a large bowled Cabernet glass!
    • Storage after opening: Once the bottle has been opened, store for 3-5 days in the fridge.
    • Long-term storage: Because of its sweet nature, you should drink icewine within 3-5 years. This type of wine is not an ideal candidate for aging. (Source)

    - Below are affiliate links to my top glassware picks -

    Recommended serving glasses

    Image of Champagne Flutes

    Champagne Flutes

    Buy Now →
    Image of Small White Wine Glasses

    Small White Wine Glasses

    Buy Now →
    Image of White Wine Glasses

    White Wine Glasses

    Buy Now →

    Step-by-step guide to drinking icewine

    1. When sipping, avoid icewine contact with the tip of your tongue

    The tip of your tongue is where your sweetness receptors are located. By avoiding contact, your palate is able to better taste all the other flavors on all other parts of your tongue, making the flavors more dynamic. Letting the other tongue flavor receptors experience the wine without the sweetness allows the other flavors to come forward and not get overpowered by the sweet sensations. Our wine guide even recommended tasting the icewine "in the back of your mouth" to really coat all the flavor receptors on your tongue.

    2. Take bigger sips

    When drinking traditional wine, we tend to take smaller sips, which is not recommended for drinking icewine. The bigger the sip, the more you really taste the flavors!

    3. Incorporate air and swish the icewine around your mouth

    When taking your sip, allow in some air and swish the sip around your palate. Swishing icewine around your mouth with some air really opens up the flavors and coats your palate. When swishing the icewine around, press your tongue firmly to the back of your teeth so it stays out of the way and doesn't activate your sweet receptors.

    4. Let the sip linger on your palate

    Holding the sip in your mouth for a few seconds longer will allow the icewine acids to catch up to your palate, completely changing the flavors. It's almost like your sip is a flavor chameleon and the acids change the flavor into something else!

    5. Let your palate rest

    After completing steps one through four, finish your sip and let the flavors linger. When I take a sip and pause, the flavors change once again - I would have completely missed some flavors if I quickly took another sip or wasn't fully focused on the full flavor experience.

    When using these sipping techniques, I absolutely tasted more of icewine's sweet, juicy flavors and toned down sweetness. With every passing second, from the initial sip to the final gulp, I could pick out different ingredient notes during each phase of the sipping experience. I would first taste guava, then the acid on my lingering sip changed the flavor to honey comb, then after I finished my sip my palate was filled with raspberry.

    Icewine flavor pairings

    The ultimate icewine flavor pairing is something bold, like buffalo wings. Yes, buffalo wings! I know this sounds a little crazy but hot sauce and blue cheese go perfectly together with icewine, which means buffalo wings with a blue cheese dipping sauce is the ultimate flavor pairing!

    I've also heard of people making icewine cocktails and blending the drink with ice (how fitting). If you are thinking of making an icewine cocktail, I would highly recommend a doing half icewine, half Ciroc vodka and blending it together with ice. Ciroc vodka is made from grapes, so it's a match made in icewine cocktail heaven!

    Now you know how to drink icewine! I promise, these icewine sipping techniques will change your icewine experience. This style of wine is so flavorful, vibrant, and fruit forward, it would be a disservice to not enjoy it and take it to its highest flavor potential!

    Still have questions about icewine? Comment below, I would love to answer your questions!

    Icewine Tasting in Niagara Wine Country

    September 27, 2018

    While researching things to do for our Niagara Falls trip, I knew an icewine tasting in Ontario had to be on the list! I had never heard of icewine but after digging around, I found out that Ontario, Canada is the largest icewine producing region in the world. Excited about trying a new style of wine, we signed up for a half day icewine tasting with four Niagara-on-the-Lake wineries on the itinerary. On our tour, we visited Pillitteri Estates Winery, Konzelmann Estate Winery, Caroline Cellars, and PondView Winery, all of which specialize in icewine making. Half way through our icewine tour, we had time to explore the quaint downtown Niagara-on-the-Lake for lunch, which was the most adorable town. But before I tell you about the icewine estates, first you should know..

    What Makes Icewine Different from Traditional Wine?

    Unlike traditional wine harvesting, icewine is created when grapes still on the vine are frozen by Ontario's winter temperatures. When the grapes are frozen, the water freezes into a solid and the sugars remain fluid. When processing the grapes for icewine, the frozen water is discarded and the remaining sugary fluid is then fermented into a tiny bottle of sweet icewine. To ensure the icewine grapes stay as frozen as possible when harvesting, the icewine grapes are hand picked on the coldest day of the year, typically in the dead of night - eek! Last year was a particularly cold year with a harvest temperature of -15ºF, which just thinking about gives me frostbite. The high price for such a small bottle is due to the fact that icewine is hand harvested, there are limited vineyards that make icewine, and it takes 10-15x more grapes to produce a small bottle of icewine than a traditional bottle of wine.

    Pillitteri Estates Winery

    Starting in 1965, this family run farm went from fruit stands to wine making, producing their first Pillitteri Estates icewine bottle in 1988. On the property they have 100 year old fruiting cherry trees and still sell a variety of produce out of their original fruit stand. At this winery, we learned about the icewine making process, how the grapes are harvested, and how to sip a glass of icewine.


    The first icewine we tried was a Chardonnay, followed by a Pino Grigio and a Cabernet Franc. All the wines were extremely sweet, with different bold fruit flavors, like guava, plum, and fig. Icewine is extremely sweet and I feel like the sweetness helps me better taste and identify the specific fruit flavors than in any other type of wine.


    Konzelmann Estate Winery

    First of all, this winery is gorgous! The Konzelmann Estate Winery is the only winery that overlooks the lake and the building looks like a picturesque castle. Being a former peach farm, this winery is known for their Peachwine, which I found to be absolutely delicious! For this wine tasting, we had a food pairing where they had the perfect bites to accompany each glass of icewine. I loved the buildings detail and enjoyed looking out at the lake from their second floor private tasting room.


    On the menu from top to bottom: salami and prosciutto, an icewine chocolate truffle, two types of cheddar cheese and blue cheese, and salty crackers. We were instructed to save the blue cheese for last which ended up being paired the the sweetest of all, the Vidal icewine. The flavor balance of strong blue cheese with sweet and fruit-forward wine was so incredible and very unsuspecting. Now thinking about the icewine and blue cheese, those two flavors work together in the same way dried fruit would go with a cheese plate - totally makes sense!


    After the first two wineries, we headed downtown for lunch. Niagara-on-the-Lake's town center looks like something out of a movie and we had just enough time to eat and explore. After lunch we grabbed ice cream and strolled past shops, blooming planters, and a historic apothecary. Everything in the downtown area felt like a small-town movie set! I would love to come back just to spend a few days hanging out in town and enjoy a picnic at a nearby park.


    Caroline Cellars

    The atmosphere at Caroline Cellars is much more laid-back than the other wineries. Walking in the door, you feel very comfortable and welcomed, almost like you are trying wine in someone's living room. I loved the wine décor! We tried a variety of icewines but my favorite was The Farmer's Blueberry Wine, which was full of blueberry flavors with notes of complimenting spice.


    PondView Winery

    At the PondView Winery we got into the nitty gritty of icewine and flavor pairings while sipping their wine outside right next to the vines. For our final tasting, they had us try the craziest icewine flavor pairing - hot sauce! We were even encouraged to add the hot sauce right into the glass and sip all together. Guys, the flavor combination totally works! PondView also had fun chocolate 'shots' that was basically an edible thimble-sized chocolate cup filled with icewine and you are to eat the shot all in one bite. It was so good! They really have fun with food here and it was such a sweet way to end our icewine tasting tour.


    I had so much fun trying icewine! Who would have thought that there were icewine tastings in Niagara? I loved the story of winter harvesting and all the flavor combinations and pairing possibilities. If you are visiting Niagara Falls, a visit to Niagara-on-the-Lake for a icewine tour has to be on the itinerary!

    Niagara Falls

    September 18, 2018

    girl in pink jacket looking at Niagara Falls from the US New York side

    Nothing could have prepared me for my first trip to Niagara Falls. Standing high up on the edge of the falls with tingling toes, mist on my face, and thousands of gallons of water rushing beneath me was such a thrill! Niagara Falls has been on our bucket list for a long time, so I was jumping for joy when the three-day trip wiggled its way onto our August calendar. After spending three days in Chicago, Mark and I hopped on a plane to Buffalo, New York and spent Thursday through Saturday in Niagara Falls. We were able to see everything in those few days, even squeezing in a wine tour! The town of Niagara is quite cute, with a few fun restaurants and food trucks here and there. On our first night we walked down to the falls right as the sun was setting, then grabbed some spicy grilled chicken and curried rice from a food truck and ordered ice cream cones for dessert. It was the perfect Summer evening and a great first introduction to the falls!

    The following day we walked across the US boarder to see Niagara Falls from the Canadian side. Mark convinced me to go on a tour called Journey Behind the Falls, where you actually go in a tunnel under the Horseshoe Falls. I am not going to lie, it was a little terrifying being in a rock tunnel behind the powerful falls but it was a really fun to experience, once we got back to safe ground! I also got a kick out of looking down after the Journey Behind the Falls and noticing that my shoes perfectly matched my banana yellow poncho - haha!
    On our last day at the Niagara Falls, we hopped on a Maid of the Mist boat tour, which ended up being my favorite part of the trip. Guided by the M & M flag, our boat went far into the falls, getting up close and personal to both the US and Canadian falls. I was surprised how close we got to the falls, sometimes getting zero visibility from the swirling waterfall mist and powerful wind gusts. While we did get pretty wet, it felt so good to get misted on such a warm day.
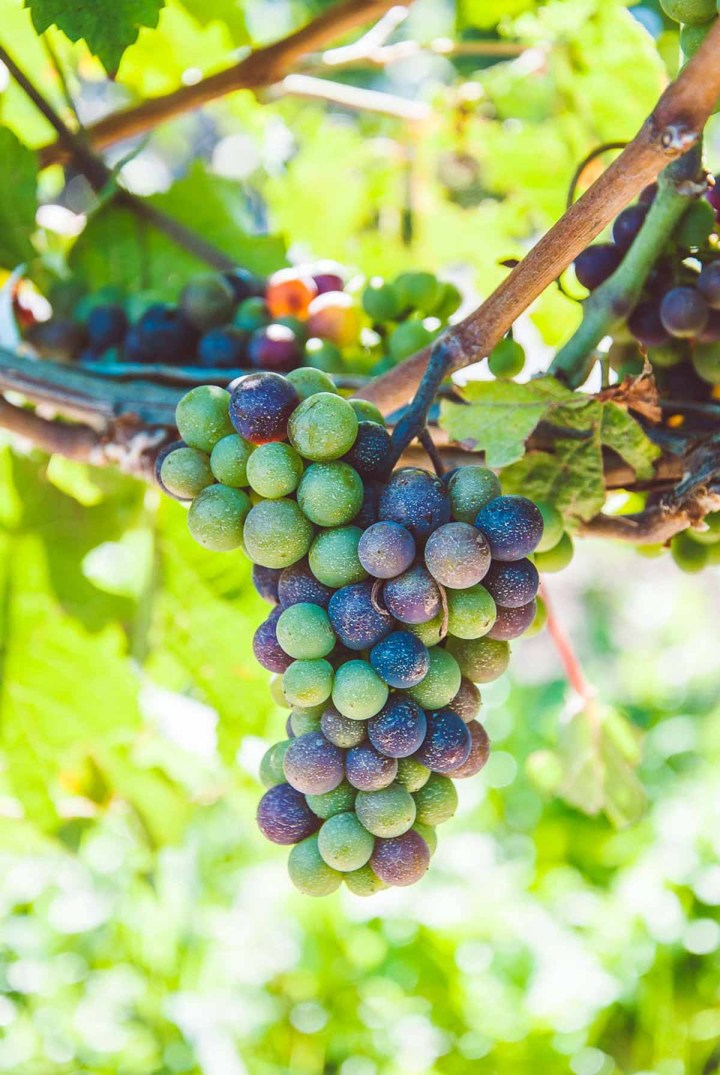
    A quick trip to Niagara Falls was the perfect weekend getaway. We saw everything, did every tour possible, went international (into Canada, haha), and were able to sneak in a half day wine tour. I can't wait to share more of Niagara with you in my next post, stay tuned for Canada's famous icewine!

    Blogging: The Highs & Lows

    September 6, 2018


    Real talk. These last few weeks have been a blogging rollercoaster, full of great highs and some recent crazy/random/unexpected lows. I’ll start this post out by saying, there is nothing I would rather do than blog. I am built for it, it fuels my creative soul, and I’ll be right here blogging away until I physically can’t do it anymore (aka zombie apocalypse.) With that being said, these last few weeks have been extremely challenging with new obstacles and frustrations. I wanted to pull back the curtain and share what’s going on behind the scenes here at Champagne and Paper Planes and talk about what has been particularly challenging for me these last few weeks.

    Blogging is equal parts exciting, frustrating, and the most wonderful thing I have ever done. The highs absolutely outweigh the lows but that doesn’t mean the lows aren’t insignificant or won’t cause you to temporarily derail. I am the sole creator, editor, writer, WordPress plug-in fixer, CSS adder, attempt-at-coding-er. Basically, I do everything myself (for better or worse) and whatever the blog needed, I somehow managed to figure it out. Until last week when I updated my WordPress to activate Gutenberg and my whole world turned upside-down.

    Gutenberg was the straw that broke the camel’s back after a long daily string of blog roadblocks. In the past few weeks I’ve had computer issues, storage issues, backup issues, SEO issues, Lightroom/preset issues, theme issues, social plug-in issues .. and the list goes on. The worst part is that I couldn’t put them off and every urgent time-consuming blogging to-do came in waves, one after the other. I was truly living the metaphor ‘when it rains, it pours’. I think the most frustrating part was that before the roadblocks my blog was on a roll, with a consistent content flowing and I felt like the sky was the limit. Then bit by bit, issues rolled into large, unmanageable problems and the blog train came to a screeching stop. I haven’t had any blog issues for months, then all of a sudden I was overwhelmed by seemingly catastrophic website issues.

    The reason why I want to share and vent with you is for a few reasons, one being an explanation of paused content. I’ve been on my blog every day working on all the backend WordPress stuff and it kills me that I have’t been able to post in few weeks! The second reason is because some of you might have a blog or want to start a blog and I think it’s important to keep it real. Running a blog as a solo-entrepreneur is fun but also tough and often times turns into a sink or swim situation where you have to be able to ride out the highs and the lows. Any blogging readers who can relate to these frustrations and mishaps?!

    Now, being a few days after my Gutenberg meltdown (yes, tears were shed), I can now see the light at the end of the tunnel. I have so many awesome things coming to the blog and my outlook on the roadblocks have changed. The remaining blog issues are out of my control and I can’t let a pending Gutenberg compatible plug-in update stop me from moving forward. Have you noticed the ‘Pin it’ button on this post covers the entire image in a big red box when scrolled over? It’s a plug-in developer issue and I can’t do anything about it, so my philosophy now is that I have to let those things go because it’s out of my control. Keep calm and blog on!

    On a lighter note, I have some exciting blog updates. I am now a dietetic internship preceptor (!!!) and will be taking interns from a local Phoenix dietetic internship in the Spring of 2019. If you are a future intern reading this, hello! I am also now moving towards the expanding and fine-tuning phase of my site. I have hired my first blog consultant to look into my website structure, something I have no idea how to do and is worth the investment. It’s a little scary hiring outside help for my site but I think it is something my website needs and will be totally worth it. I am also so excited about Fall and have some fun recipes coming – stay tuned!

    If you made it all the way down to the end of this post, thank you! It feels so good to go through and explain everything that has been going on. The blog (and let’s be real – also my emotions) is on the mend and I can’t wait for what’s next. Gutenberg and all.

    Cheers, Michele

    The Best Summer Wine That's Under $20 - Bugey-Cerdon La Cueille

    August 13, 2018

    a bottle of Bugey-Cerdon La Cueille French sparkling wine bring poured into a flute

    Still searching for the perfect Summer wine? I've got you covered because the Bugey-Cerdon La Cueille French sparkling wine is the best Summer wine of all time! This bubbly wine is quite surprising with an incredibly girly color but a flavor that everyone will love. The Bugey-Cerdon La Cueille is not overly sweet with pops of mouthwatering strawberry and honey crisp apple. The bubbles in your flute will seemingly carry on forever as you cheers to the end of Summer. The best part about this wine is that you can find it for around $20. Cheers to that!

    I first tried the Bugey-Cerdon La Cueille sparkling wine at Binkley's, where Mark and I enjoyed a wine pairing with our 23-course dinner. Our first course was a hibiscus foam with yogurt dipped asparagus, and accompanying the dish was a gorgeous wine flute filled with something pink and bubbly. The dish was incredible and the pairing was absolutely perfect but I was entranced by the wine! The color was so vibrant, the bubbles lasted for so long, and the flavor was a delicious semi-sweet champagne. We asked the Sommelier about the wine and she told us all about what makes this wine so special and one of the best Summer wines!


    bottle of Bugey-Cerdon La Cueille French sparkling wine with filled wine glasses and flowers

    There are a few things that make this wine so special. First, the region of Savoie Bugey France is located near the borders of Switzerland and Italy, and has been making wine since Roman times. The Bugey wine region also has a very unique climate where you can find both snow and warm-weathered palm trees on the same horizon. The region is also known for their local, small batch wineries, with the Bugey-Cerdon La Cueille winery only producing 4,000 cases a year.

    For its unforgettable bubbles, the Bugey-Cerdon La Cueille winemakers use the oldest sparkling wine method, méthode ancestrale. This traditional double fermentation technique occurs when the wine is partially fermented, then bottled and continues to ferment until the natural sugars have disappeared. Méthode ancestrale uses no added sugar for fermentation and is very risky, requiring a winemaker who has experience and extensive knowledge about this process. From the hand picked grapes, to the fermentation technique and batch size, it's so exciting that this wine comes at such an enticing price point!


    a bottle of Bugey-Cerdon La Cueille French sparkling wine bring poured into a flute

    How can you get your hands on this incredible Summer wine? Mark bought a few bottles from Wine Library and I also found a site called Wine Empire that had similar pricing. And in case you were wondering, no, this post is not sponsored. I just truly love this wine and know you will love it too. Cheers to Summer and cheers to the Bugey-Cerdon La Cueille!

    Buffalo Chicken Pasta Salad - EatingWell Magazine

    August 9, 2018

    buffalo chicken pasta salad on a white plate with a wooden spoon

    Just thinking about this Buffalo Chicken Pasta Salad makes my mouth water! This EatingWell Magazine recipe is on constant rotation, especially this Summer when something so bold and flavorful can be made ahead and enjoyed chilled. This dish is the complete package with the perfect balance of protein, pasta, and veggies. This recipe also calls for a hot sauce, vinegar, yogurt dressing that makes the prettiest vibrant pink/orange color and is bursting with creamy, vinegary, spicy flavors. Topping this hot sauce chicken salad with blue cheese gives me all the chicken wing vibes, just in pasta salad form. Win, win!

    Chef's Tip: After making this recipe a few times, I have a couple tips if you decide to make this recipe too. Something that surprised me was how much I loved Frank's Red Hot Sauce which the recipe recommend. I always end up adding more to my pasta salad! I bought Frank's Red Hot Sauce for this recipe and the flavor was so incredible that I wanted to put it on everything! I also found that the prettiest pasta for this buffalo chicken pasta salad is the campanelle pasta, which looks like a pretty flared Summer dress.

    My last chef's tip is about the shredded chicken, here are a few ways you can tackle this ingredient:

    1. Buy a rotisserie chicken and shred it with your hands while it's still warm (it breaks apart easier than if it were chilled).
    2. Some grocery stores sell shredded chicken, it's usually located near the rotisserie chicken counter.
    3. Poach your own chicken! The last few times I made this recipe I poached and shredded my own chicken and it was divine! Just simmer a few chicken breasts in a frying pan filled with water for about an hour or until your thermometer reads 165° F or 75° C. The chicken breasts should be fully submerged in water, refilling the water if it gets too low. When it's ready, take the chicken out of the water and shred with two forks. Because this recipe has such a flavorful dressing and delicious toppings, I didn't need to add any salt or seasoning to the shredded chicken. If you are in a hurry about preparing the chicken, butterfly or cut the chicken breasts in half lengthwise through the thickest point so they can cook faster.

    Beer Pairing: When enjoying this buffalo chicken pasta salad for dinner or a weekend lunch, we always pair this meal with a light beer like an amber or blonde ale. The light beer not only cools us off from the Summer heat but is also able to wrangle any spice coming from that incredible hot sauce I doused all over my meal.

    Dietitian's Note: I love that this recipe uses half mayonnaise and half greek yogurt! While I love mayonnaise, I usually only add one or two tablespoons to my burger bun or sandwich bread. Supplementing the dressing with half mayonnaise and half greek yogurt allows you to still have that creamy mayonnaise feel while getting all the benefits of the greek yogurt. The greek yogurt adds protein and beneficial gut bacteria, and lowers the fat content while providing tangy and creamy flavor.

    Click Here for the EatingWell Magazine Buffalo Chicken Pasta Salad Recipe

    For more of my favorite recipes on the internet, check out my Chef Off Duty series. I love to dish about my favorite bites, let me know if you have any favorite recipes I should try!

    Introducing the Cooking Club

    August 7, 2018

    Hand overhead sprinkling shredded yellow cheese over a silver skillet that is full of upright stuffed bell peppers and a wooden spoon and white cup full of cheese laying in front.

    I am so excited to introduce my Cooking Club series! Cooking Club is where I celebrate and share my favorite recipes created by other chefs and food bloggers.

    When I am not whipping up my own creation, love opening up a cookbook or googling 'best banana bread recipe'. Cooking from someone else's recipes takes me out of my comfort zone and exposes me to new dishes, ingredients, and techniques that I otherwise wouldn't have tried!

    I recently started printing and organizing my favorite go-to recipes into a booklet so I can always turn to them. I found it a little unfair that I was holding on to these incredible recipes and not share them! Just because they are not my original recipes, I didn't want keep them from you because they are truly some of the best.

    Here are the Cooking Club guidelines:

    • All photographs are my own.
    • I will share some tips I learned after making the recipe a few times.
    • I will never post the original recipe, I'll just link to the blog post or cookbook.

    If you have a recipe you think I would love and should be featured on Cooking Club, comment below and let me know!

    Hand overhead sprinkling shredded yellow cheese over a silver skillet that is full of upright stuffed bell peppers and a wooden spoon and white cup full of cheese laying in front.

    Mango Butter

    August 2, 2018

    Oh my gosh, this mango butter is everything .. and then some. Not only does this recipe taste like a silky spreadable mango, it also has only has 4 ingredients and can be whipped up in less than 20 minutes! With a little drizzle of honey and a dash of lime zest, this mango butter can be spread on anything and everything - no judging.

    I was inspired to make this mango butter after going to a Hawaiian luau a few weeks ago. With our dinner, they served a beautiful light pink guava butter that rocked my world. I've made compound butters before, though usually with garlic, herbs, and savory seasonings. When whipping up this fruit compound butter, I decided to swap the guava for mango because mangos were all over the grocery store and their sweetness was too perfect to pass up

    After a few recipe tests, I made the ultimate mango butter spread and know you will be as obsessed with it as I am! Spread on everything from breakfast to seafood (yes, seafood!), you need to try this easy mango spread.

    YOU MIGHT ALSO LIKE: Sauces & Spreads Recipe Archive  /  Maui Travel Archive /  Roasted Peaches with Cinnamon Mascarpone

    The proper technique for creating this mango fruit compound butter is to blend in the mango slowly, one piece at a time, into the honey lime butter ensuring even blending and incorporation. The reason for this is that adding too much mango too quickly will cause the butter to break resulting in chunky, separated, almost watery butter. Avoid the butter breakage by squeezing out the juice from the mango with a paper towel and slowly blend dried mango pieces into the butter to ensure zero butter breakage. Using this technique will ensure that your spread is a smooth as butter.

    CHEF'A TIP: Not using your mango butter right away? Roll it up like a log in plastic wrap and stick it in the freezer. When you are ready to use it, unwrap the butter and cut off a medallion sized piece and put the rest back in the freezer. You can freeze for up to 6 months, so no rush to use it all - although I am not sure how you could resist!

    I have a hard time not spreading this mango butter recipe all over everything but I do have a few suggestions on how to use this silky mango spread:

    • With bread, like a Hawaiian sweet roll or baguette
    • On waffles or pancakes.
    • Lighter protein, like white fish, shrimp, chicken, or pork

    Pairing this mango spread with protein might seem weird but trust me, you want this mango butter on your dinner plate! Think, pork with peaches or blackened cod with a fruit salsa. Now think.. mango honey butter on shrimp. Yes! Spread on top of your freshly cooked protein and let it melt and ooze down the sides before serving. I recently spread this mango honey butter on my shrimp before serving and it took my dish to a whole other level!


    DIETITIAN'S TIP: Mangoes are full of nutrients and I love that this recipe uses the entire fruit! Mangoes have over 20 different vitamins and minerals, with one mango providing half of the vitamin C you need in a day. Vitamin C is a powerful antioxidant that helps your body remove harmful free radicals and keeps your immune system runs smoothly. Click here for more information on mango nutrition.

    Just like that, you've got yourself an easy mango spread! You can make this recipe ahead of time, just cover and refrigerate a few days before. Before serving, let the mango butter soften on the counter for a few minutes, it really helps the spreadability!

    WINE PAIRING: This mango spread pairs perfectly with a light champagne that has little dryness and lots of bubbles. The consistency of butter is one-dimensional, so a bubbly champagne adds an exciting textural element to the palate. The bold mango sweetness also balances well with a dry, less flavorful champagne making these two the ultimate brunch duo.

    Did you make this mango butter recipe?

    Comment and rate this recipe below - I'd love to know what you served with this tasty mango spread!

    Print

    Mango Butter

    overhead of mango fruit compound butter with bread
    Pin Recipe
    Print Recipe

    ★★★★★

    5 from 1 reviews

    This Mango Butter is the ultimate fruit compound butter! It tastes like spreadable mango, has hints of lime zest, and is perfectly sweet. This fruity and sweet compound butter recipe is perfect for seafood, meat, pancakes, or bread. Spread this dessert compound butter on anything and everything, I know you will eat it up!

    • Author: Michele Sidorenkov, RDN
    • Prep Time: 5 minutes
    • Cook Time: 15 minutes
    • Total Time: 20 minutes
    • Yield: 1 cup 1x
    • Category: Compound butter
    • Method: Blending
    • Cuisine: Tropical

    Ingredients

    Scale
    • ½ Stick (4 tablespoons) of softened unsalted butter (to soften, take butter out of the refrigerator 1 hour before preparing the recipe)
    • 1 teaspoon honey
    • Zest of 1 lime (makes about 1 teaspoon zest)
    • 1 Ripe mango, peeled and cut into cubes

    Instructions

    1. Using a few paper towels, squeeze a few mango pieces into a paper towels to remove excess moisture. You want to be firm when squeezing the mango pieces but not making them bone dry (see note 1).
    2. In a food processor, pulse butter, honey, and lime zest together until incorporated. Slowly start pulsing and blending the paper towel dried mango pieces to the butter, 1 or 2 tablespoons at a time - don't rush it! You might need to scrape the sides and bottom of the food processor a few times to ensure the mango pieces are getting well incorporated.
    3. Scoop out the mango honey butter and transfer to a serving container. The butter is ready to serve but if you want to firm it up, refrigerate for 30-60 minutes before serving. You can garnish with lime zest or honey if you'd like!

    Equipment

    Image of Unsalted Butter

    Unsalted Butter

    Buy Now →
    Image of Cuisinart Food Processor

    Cuisinart Food Processor

    Buy Now →

    Notes

    The equipment and ingredients linked are affiliate links. I only list the brands I personally use and highly recommend.

    1. If the mango is too juicy and/or the mango is incorporated too quickly, the butter will break. Really making sure the juice is removed and slowly adding the mango when blending will make sure the mango is evenly dispersed into the butter for the creamiest and smoothest consistency.
    2. Cover and refrigerate leftovers for a few days or freeze up to 6 months.

    Nutrition

    • Serving Size: 1 tablespoon
    • Calories: 35
    • Sugar: 2 g
    • Sodium: 1 mg
    • Fat: 3 g
    • Saturated Fat: 2 g
    • Unsaturated Fat: 1 g
    • Trans Fat: 0 g
    • Carbohydrates: 3 g
    • Fiber: 0 g
    • Protein: 0 g
    • Cholesterol: 8 mg

    Keywords: Fruit compound butter

    Did you make this recipe?

    Tag @mymillennialkitchen on Instagram or leave a comment and rating below!

    A New Side of the Maui Island

    July 30, 2018

    Feet standing at a avocado stand in Maui

    Maui sometimes feels like my home away from home. Every year, my family and I spend Christmas and New Year's Eve in Maui where we lounge, eat, and relax for two weeks of Hawaiian vacation bliss. We always stay somewhere on the water in Kihei, eat at the same restaurants, explore the same shops, and do a lot of the same-old-same-old. We have done pretty much everything there is to do on the East side of the island, from hiking into the Haleakala creator to enjoying quite a few Luaus at the Grand Wailea.

    While I love the East side of Maui, I've been eager to explore more of the island and was excited to get the chance when my close friend Jennifer invited me to join her family vacation. When Jen's family goes to Maui, they almost always stay on the West side of the island near Lahaina, a place I have visited many times but never spent more than an afternoon exploring. I couldn't wait to see more of the Lahaina area and experience new beaches, shops, and restaurants. A really fun part of Jen's family vacation is that this was a birthday trip for her dad and everything on our eight day itinerary was a complete surprise to him. Typically he wouldn't find out what we had planned that day until we got there - even to the airport for a one-day turnaround trip to Pearl Harbor! This trip was so stress-free with equal parts lounging and exploring - the perfect recipe for the ultimate Maui vacation! Now, let me show you a new side of the Maui island!


    Roadside Fruit Stand

    Right off the Honoapi'ilani highway, we spotted a fruit stand, shaded under gorgeous overhanging trees. I love Hawaiian fruit stands and always get excited when I spot a unique and unfamiliar tropical produce item! While digging through the freshly picked produce boxes, we found four different avocado varieties, fresh sugar cane sticks, papaya, and baby pineapples. While we shopped, chickens wandered in and out of nearby bushes and kittens napped in the shade. After shopping at the fruit stand, we headed next door to Leoda's pie shop for more bites to take back to the hotel. I ordered a mini key lime pie and it was zesty, creamy, and perfectly sweet. Let's just say that for the next few days, we had the best snacks!


    Old Lahaina Luau

    Luaus are one of my favorite things to do in Maui! You get an amazing show (usually involving fire!), tasty drinks, and enjoy a spread of Hawaiian dishes. I've been to quite a few hotel luaus and always heard the Old Lahaina Luau was one of the best. Almost every year we would talk about making the drive out to Lahaina for a luau but it was too far away. This time, staying on the other side of the island meant that the Old Lahaina Luau was so close and I was so excited when I found out we were going!

    The Old Lahaina Luau is not part of a resort, so the entire outdoor venue is designed for the ultimate dinner and show. The food was amazing and included traditional Hawaiian dishes like poi, Kālua slow roasted pig, and Mahi Mahi. One of my favorite dinner items was a pink guava honey butter, which we spread on purple sweet potato rolls. I was so inspired by their guava honey butter that I decided to play around in the kitchen at home, coming up with my own creation. Look for that recipe coming soon! After dinner we caught a breathtaking sunset and shortly after enjoyed incredible desserts like smoky kiawe bean tarts, passion fruit cake, and salted chili pepper brownies. The show was also incredible with so many costume changes and great story telling. It was the perfect way to end the delicious evening!


    Sunset Dinner Cruise

    About half way through our trip, we went on an incredible sunset dinner cruise with Alii Nui! Being my first dinner cruise, I was blown away by the whole experience. There was something so magical about being on the water with the warm air surrounding you. The food was incredible, the drinks were fantastic and we caught a killer sunset. We were told by the Captain that on a clear night you can sometimes see a green burst of light right as the sun disappears into the water (just like in the Pirates of the Caribbean!) While we didn't see the green burst, we did have crystal blue skies and incredible island views from the sea.


    Day Trip to Pearl Harbor

    This was our longest, yet most exciting day of the trip! We woke up at 3am to make an early morning flight to O'ahu where we caught a tour bus and spent the day learning about historic military landmarks and monuments. I had a lot of apprehension before this day trip because I have a weird fear of big ships, specifically large metal military and cargo ships. Submarines, buoys, and deep water all fit into that category as well, so I had to really prepare myself and face my fears to experience something that I would have otherwise never had the chance to experience. What better time than now to get over this ridiculous phobia, right?! I honestly have to say that I had such a great time and despite my fears, felt so lucky to be able to experience such a historic, tragic, and symbolic site. I am so happy I concurred my fear and was able to fully immerse myself in the Pearl Harbor monument experience.


    We first started with a submarine tour, then took a boat out to the sunken USS Arizona, and ended with the USS Missouri Battleship Monument museum. We unfortunately were not able to walk out onto the floating USS Arizona Monument because of a foundation crack but we were able to boat around the ship and see a little below. I got chills thinking about all the history below the water, it was an incredible, humbling experience.


    The USS Missouri was one of my favorite parts of the trip because we were free to explore the entire ship. I ended up spending a lot of time in the battleship kitchen and dining hall where they had a menu posted along with some recipes. We ended the day with a trip to the Ford Island Aviation Museum and Punchbowl Crater National Cemetery.


    Mama's Fish House

    I can't believe I had never been to Mama's! I had always heard it was a must but never ventured out to actually go. My family is not very into the food scene, so to them Mama's was never on the list because it wasn't close to where we usually stay. I am so happy that Jen's family loves food and made reservations! It was everything I imagined and so much more. The ambiance, the service, the food, everything was like a dream. I ordered the mahi mahi stuffed with crab and lobster, baked in a macadamia nut crust and it was fantastic!! Someone at our table ordered the traditional Hawaiian plate which had little bites of traditional Hawaiian dishes like poi, poke, purple potatoes, mahi mahi, and slow roasted pork. That beautiful dessert below is the Polynesian black pearl with chocolate mouse with a cookie shell. It was incredible! After finally experiencing Mama's, I totally get the hype and think it's the best restaurant on Maui.


    On one of the last few days we checked out the Whalers Village and grabbed one last dinner before having to go back and pack our bags. I had one last piña colada and enjoyed a bite of Pono pie, which is made out of sweet potato and topped with bread fruit. It was the perfect way to end our vacation!


    When we wen't exploring the island and our itinerary was wide open, we enjoyed lounging and eating, and lounging some more. It was such a relaxing vacation and I was so lucky to have been able to join such a fun and perfectly planned vacation. If you want to experience more of Maui with me, I have a highlights page on my Instagram account @Champagneandpaperplanes_com where you can see all my videos from the trip. Till next time Maui, I am sure I will see you again sometime soon!

    • « Go to Previous Page
    • Go to page 1
    • Interim pages omitted …
    • Go to page 3
    • Go to page 4
    • Go to page 5
    • Go to page 6
    • Go to page 7
    • Interim pages omitted …
    • Go to page 17
    • Go to Next Page »

    Footer

    ↑ back to top

    About

    Media Mentions

    Contact Me

    Sign Up for My Newsletter

    Email Me

    Resources

    Privacy Policy

    Disclaimer

    Terms of Use

    Advice for Nutrition Students

    Some products linked or discount codes provided throughout this site are affiliate programs. I receive a small commission if you purchase any items through the links or codes I provide.

    Copyright © 2022 Mymillennialkitchen