• Skip to primary navigation
  • Skip to main content

My Millennial Kitchen logo

  • About
  • Recipes
  • Travel
  • Blog
  • Subscribe
menu icon
go to homepage
  • About
  • Recipes
  • Travel
  • Blog
  • Subscribe
    • Email
    • Instagram
    • Pinterest
  • subscribe
    search icon
    Homepage link
    • About
    • Recipes
    • Travel
    • Blog
    • Subscribe
    • Email
    • Instagram
    • Pinterest
  • ×

    Home

    The Best Thanksgiving Wine

    November 16, 2018

    red schooner wine bottle

    When looking for a Thanksgiving wine recommendation, there are so many factors to consider. The best Thanksgiving wines are crowd pleasers but also conversation starters with an air of uniqueness. Thanksgiving is something to celebrate and you want to welcome your guests with a wine as special as the occasion!

    Every wine has a story. When I open a wine bottle, I think about the laboring hours, winemakers, and decisions made, just so I can enjoy a glass of wine. Similarly, Thanksgiving is a time where people gather and enjoy a meal made with lots of thought, care, and preparation.

    Thanksgiving is also a time where people commemorate another kind of story, one that reflects on an iconic voyage of settlers arriving to America on the Mayflower. For such an amazing journey, you need an equally rivaling wine - and I found just the one.

    red schooner wine bottle

    My Thanksgiving wine recommendation is Red Schooner, not only because of its incredible flavor but because the grapes took a voyage of their own, crossing continents from their origin in pursuit of something great.

    The Red Schooner story begins in Argentina, where the Malbec grapes are grown. After harvest, the grapes make the voyage from Argentina up the Pacific Ocean to Napa Valley where the Wagner Family turns those grapes into wine. The Wagner Family uses their classic dense and dark Caymus-style techniques to produce an incredible bottle of Red Schooner. Each voyage is tied to a year, with voyage 5 (my personal favorite!) being a 2014 vintage.

    If you look closely, you'll notice the wine bottle illustration is of a schooner ship leaving Argentina on its way to Napa Valley with the Andes Mountains in the background. The old-world depiction of the long, cross-continent journey mirrors that of the pilgrims and the start of their long journey ahead.

    Red Schooner is a rich Malbec with dark, juicy fruit flavors. Malbecs are the great choice for a Thanksgiving because most people like their low on tannins and deeper fruity flavors. Malbecs also pair well with hardy meals and compliment most ingredients found in Thanksgiving dishes.

    I've seen Red Schooner in places like Total Wine and More, Safeway and Whole Foods, so you should be able to find it pretty easily. A bottle at the store usually goes for around $50 but can vary based on the vintage.

    From the voyage story to the red fruity flavors, this truly is the best Thanksgiving wine. I hope everyone has a happy Thanksgiving, full of good food, great wine, and even better company!
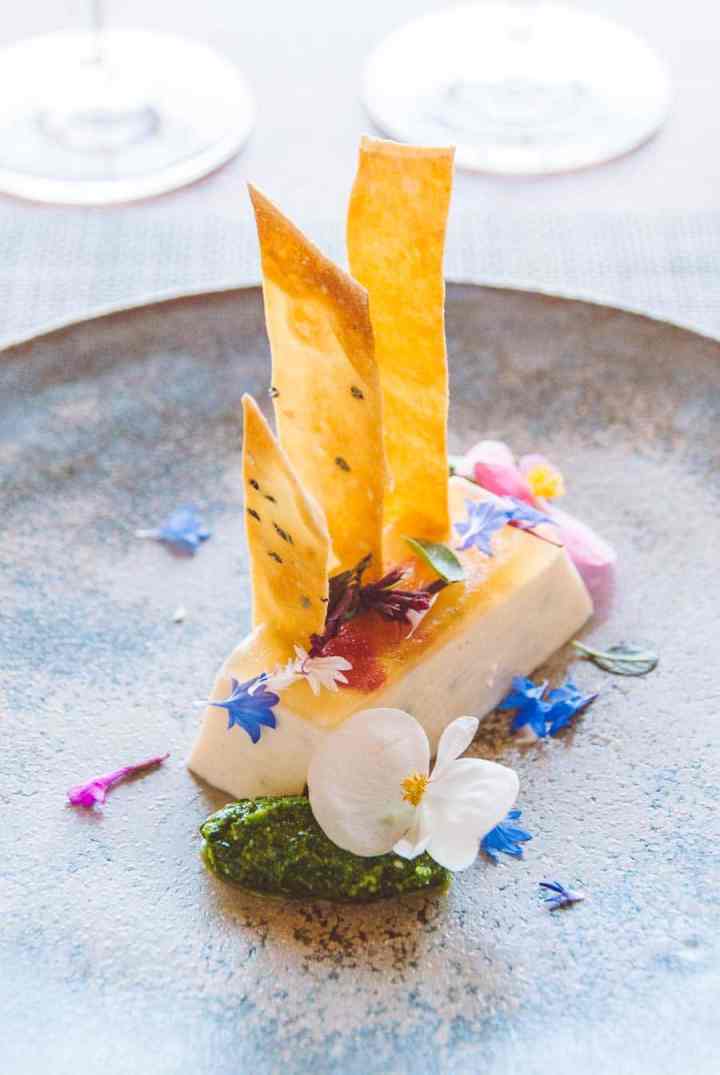
    Cranberry Sauce with Grand Marnier

    November 12, 2018

    White cup full of cooked cranberries with a brown bottle and jigger in the background

    Let's take a classic Thanksgiving side dish up a notch with this gourmet cranberry sauce with Grand Marnier orange liquor! This cranberry sauce recipe is full of holiday flavors, like cinnamon, allspice, and freshly squeezed orange. Elevate your Thanksgiving dinner menu with a splash of Grand Marnier!

    White cup full of cooked cranberries with a brown bottle and jigger in the background

    This post contains Amazon affiliate links. If you buy any items through my Amazon affiliate links, I get a small commission on the sale.*

    A few years ago, my mom found a Thanksgiving recipe in the newspaper for a homemade cranberry sauce and she decided to give it a go. Every year, the recipe changes with a little more of this and a little pinch of that. This year, I’ve added some flare to the dish with a unique cranberry sauce twist. Orange liquor really makes this recipe feel fun and fancy, elevating your entire holiday menu.

    This super easy gourmet cranberry sauce takes only 35 minutes to prepare. Having a no-fuss cranberry side dish recipe on the menu frees you up, giving you more time to focus on other, more complicated Thanksgiving recipes.

    Photo collage showing the three step instructions for making a sauce out of cranberries

    Check out the recipe card below for more details but to make this Grand Marnier cranberry sauce recipe on the stovetop, you just lightly simmer cranberries, sugar, water, juice from an orange, and a cinnamon stick. After 15 minutes, add orange zest, Grand Marnier, and allspice, then continue to simmer for another 15 minutes. Lastly, take out the cinnamon stick and chill before serving. Yes, this fancy cranberry sauce is that easy!

    And guess what?! This gourmet cranberry sauce recipe just got even easier. If you are running low on stovetop space (because.. Thanksgiving!), I added slow cooker instructions to the recipe card below! The slow cooker recipe card instructions are very similar to the stovetop instructions, just with modified times and temperatures.

    Recipe Tips:

    • SAUCE TEXTURE: If you want a sauce with more texture and semi-intact cranberries, keep the simmer low. The more aggressive the simmer, the higher the likelihood your cranberries will burst.
    • STORING: This Grand Marnier cranberry sauce recipe can be stored in the refrigerator for up to a week. When storing, make sure the cranberry sauce is properly sealed, dated, and labeled. All cranberry sauces should be stored in a non-metallic glass container.
    • FREEZING: Yes, can freeze homemade cranberry sauce! This homemade cranberry sauce can last up to 3 months in the freezer, just let thaw in the refrigerator before using. You can also freeze any leftover fresh cranberries for up to 18 months. Just place in a label and dated sealable bag, then lay flat in the freezer until fully frozen. When you are ready to use your frozen cranberries, just pop them into the recipe - no need to defrost.

    White cup full of cooked cranberries with a white background and spoon beside the cup

    Recipe FAQ:

    Will the alcohol burn off after cooking?

    To put it simply, when fully prepared, there will be some alcohol left in this cranberry sauce recipe. For measuring heat and alcohol evaporation, there isn't really an exact formula but the higher the temperature and the longer something cooks, the higher the rate of alcohol evaporation. Based on USDA research, I can estimate that about 60% of alcohol in this recipe will burn off if prepared on a stovetop and even more alcohol will evaporate if prepared in the slow cooker.

    Stovetop vs. Slow Cooker - Which method is best?

    Cooking this Grand Marnier cranberry sauce on the stove creates a more congealed jam, while the slow cooker makes a more loose sauce. The slow cooker is also better able to keep the shape of the whole cranberries, which tend to burst if on too high of a heat on the stove. Having whole cranberries in your sauce really makes the dish feel very gourmet and fancy! Whichever cooking method you choose, your cranberry sauce will taste the same.

    Is this cranberry sauce healthy?

    This Grand Marnier cranberry sauce recipe has cranberries and oranges, both of which are full of inflammation-flighting antioxidants. The specific antioxidants found in cranberries also have the unique ability to stop harmful bacteria and fight infections, which can be helpful during cold and flu season.

    Worried about gaining a few extra pounds during the holiday season? Cranberries can also trigger your fullness cues, signaling to your brain that you are no longer hungry. Cranberries won't stop you from indulging in your favorite holiday dishes (which you should shamelessly enjoy!), but they might stop you from overeating or taking one too many second helpings. (Source 1, Source 2)

    For this particular cranberry sauce recipe, I only added the minimum amount of sugar needed to take away the bitter cranberry taste without overloading the sweetness. This healthy cranberry sauce recipe is also sweetened with a freshly squeezed orange, which adds even more beneficial nutrients to this cranberry sauce recipe.

    White cup full of cooked cranberries with a white background

    SHOP MY EXACT INGREDIENTS

    - Amazon Affiliate Links -

    Cranberries, Sugar, Cinnamon Sticks, Allspice

    OTHER HOLIDAY RECIPES YOU’D LOVE: Semi-Homemade Pumpkin Pie Trifle  //  Port Poached Pears  //  Spiked Holiday Cider

    If you made this Grand Marnier cranberry sauce recipe, let me know in the comments section below or tag me on Instagram @mymillennialkitchen. I’d love to see your pictures, comments, or recipe questions!

    Print

    Cranberry Sauce with Grand Marnier

    White cup full of cooked cranberries with a brown bottle and jigger in the background
    Pin Recipe
    Print Recipe

    ★★★★★

    5 from 6 reviews

    Let’s take a classic Thanksgiving side dish up a notch with this easy homemade cranberry sauce with Grand Marnier! This side dish is full of holiday flavors like cinnamon, allspice, splashes of citrus, and elevated with a little orange liquor. This homemade cranberry sauce with Grand Marnier recipe is perfect for a stress-free Thanksgiving.

    • Author: Michele Sidorenkov, RDN
    • Prep Time: 5 minutes
    • Cook Time: 30 minutes
    • Total Time: 35 minutes
    • Yield: 1 ¾ cup (serves about 10-14 people) 1x
    • Category: Sauce
    • Method: Stovetop
    • Cuisine: American

    Ingredients

    Units Scale
    • 3 cups fresh cranberries (about one 12 oz. package)
    • ¾ cup sugar
    • ¼ cup water
    • 1 medium orange (preferably Naval or Cara Cara)
    • 1 cinnamon stick (can substitute with ½ teaspoon ground cinnamon)
    • 2 tablespoons Grand Marnier
    • ⅛ teaspoon ground allspice

    Instructions

    1. Zest the outside of the orange until you have 1 tablespoon of zest. While zesting, make sure to avoid the bitter white pith under the orange peel. Cut the orange in half and squeeze until you have about ¼ cup juice.
    2. In a medium sauce pot, add cranberries, sugar, water, freshly squeezed orange juice, and cinnamon stick, then stir. Slowly bring the pot to a simmer uncovered on medium heat and let cook for 15 minutes.
    3. Add orange zest, Grand Marnier, and ground allspice to the pot and continue to slowly simmer uncovered for another 10-15 minutes.
    4. Remove the cinnamon stick and transfer to a heat-safe glass container and cool in the refrigerator before serving.

    (slow cooker alternative instructions below)

    Notes

    Alternative Slow Cooker Instructions:

    1. Add cranberries, sugar, water, freshly squeezed orange juice, and cinnamon stick to a slow cooker. Cover, set to low heat and let cook for 5 hours.

    2. Stir in the orange zest, Grand Marnier, and ground allspice, then cover and continue to cook for another hour.

    3. Cool in the refrigerator before serving.

    • STOVETOP VS. SLOW COOKER – The flavor of the dish will be the same no matter the cooking method. With the stovetop, the cranberry sauce will be more jammy and congealed, while the slow cooker cranberry sauce is more loose and is able to better maintain the whole cranberry shape.
    • STOVETOP TIP - On the stove, slowly simmering instead of boiling will prevent the cranberries from bursting and loosing their shape.
    • MAKE AHEAD – This cranberry sauce can be stored in the refrigerator for up to a week.
    • STORAGE - Always store your cranberry sauce in a non-metallic container. I use these these glass containers.
    • FREEZING - You can freeze this recipe for up to 3 months. When you are ready to use your frozen cranberry sauce, just thaw in the refrigerator. You can also freeze any leftover whole, fresh cranberries, which can last in the freezer for up to 18 months!

    Nutrition

    • Serving Size: 2 tablespoons
    • Calories: 62
    • Sugar: 12
    • Sodium: 1 mg
    • Fat: 0 g
    • Saturated Fat: 0 g
    • Unsaturated Fat: 0 g
    • Trans Fat: 0 g
    • Carbohydrates: 13 g
    • Fiber: 1 g
    • Protein: 0 g
    • Cholesterol: 0mg

    Keywords: cranberry sauce with Grand Marnier

    Did you make this recipe?

    Tag @mymillennialkitchen on Instagram or leave a comment and rating below!

    Lunch at Silver Oak Winery in Alexander Valley

    November 9, 2018

    white lunch plate with lamb and vegetables, silverware on the side and wine glasses above filled with red wine

    It's no secret that Northern California produces some of the best wine in the world. Whenever I'm visiting family back in the Bay Area, I want to pinch myself being only an hour away from incredible wineries. With an upcoming trip to Marin planned, Mark and I had the difficult task of selecting one winery to visit. How do you choose? We have always loved Silver Oak and usually gift a bottle for the holidays. Then, we saw that there was a four course tasting and wine pairing lunch at Silver Oak and we were sold! We also decided to also tack on a tour for good measure.

    girl standing in front of the Silver Oak Winery iconic white water tower

    Right when we arrived, we were greeted by the iconic white water tower, which is the symbol of their winery. The water tower is a reminder of traditional watering methods, which is in stark contrast with the winery we were visiting. The Silver Oak Winery in Alexander Valley is brand new and Platinum LEED Certified, which makes them the most sustainable winery in the world. Every inch of the property, from the tasting room to the field irrigation, has been meticulously planned with sustainability driving the design.

    The Silver Oak tasting room is open, modern, and minimalist with floor to ceiling windows looking out into the vineyard. Looking through those giant windows makes me feel like I am right out in the vines, almost hearing the gravel beneath my feet if I take one step through the glass. The interior building materials are a mix of cement, redwood, and oak which gives the tasting room an urban and organic feel. The building's redwood panels are from the wine tanks of a 1930's Cherokee Winery, which were then reclaimed from Robert Mondavi. The oak panels are from naturally fallen oak trees from the local area and have been repurposed to cover the winery floors and ceilings.


    We started our winery tour out in the vines with wine glasses in hand. I loved learning about Silver Oaks commitment to sustainability, their current grape varietals, and Alexander Valleys terroir; it was so fascinating! We ended the tour in their culinary garden where produce, herbs, and bee-friendly flowers were blooming. When putting together the seasonal menu, the Winery Chef Dominic Orsini always looks to the garden for inspiration. Every dish is centered around their garden, with ingredients going from harvest to plate within an hour or so. I walked through the garden looking for the freshest picks, hoping to get a hint for what would be on our tasting menu! While we walked through the garden, the Chef came out with Spicy Tuna "Tots," which had a layer of raw spicy tuna on top of crispy rice, topped with fermented gochujang aioli. It was such a delicious bite and I could hardly wait for what more was to come.


    All tucked in and ready for lunch, we started with a Zucchini Linguini (say that 3 times fast) with pancetta, sweet corn, and white beans. I loved how the Chef spiralized a yellow zucchini and couldn't get enough of the creamy corn broth, made from boiling corn husk silk strands. This dish was paired with 2016 Russian River Valley Twomey Pinot Noir, a perfect choice!


    Then came a Lamb Loin which was resting on an eggplant purée. On the other side of the plate were cucumbers, olives, and tomatoes on top of a creamy and tangy tzatziki sauce. A spicy nasturtium flower and leaf garnished the pate. Our lamb was paired perfectly with a 2014 Alexander Valley Silver Oak Cabernet Sauvignon.

    Our lunch at Silver Oak Vineyard ended with a Ricotta Cheese Panna Cotta which had suspended black truffle flakes, pesto, and begonia flowers from the garden. Absolutely stunning! Our cheese course was paired with a 2013 Napa Silver Oak Cabernet Sauvignon. After our last course, we were invited into the Silver Oak Wine Library where we were poured a glass of 2007 Alexander Valley Silver Oak Cabernet Sauvignon. The tucked away Wine Library is very dark and grand! Magnum and double magnum Silver Oak bottles are displayed around the room with bottles dating back to the Great Depression. It was so special to see such an incredible collection of wine.


    I can absolutely say, without a doubt, we will be back! Everything about this winery was perfection. I love how everything at Silver Oak is crafted around sustainability, local sourcing, and seasonality; from their building to their food! Those three things are very important to me, and when you pair it all with wine, it checks all my boxes!

    What's your favorite Northern California winery? Do you have a go to lunch spot when you visit?

    How to Cut an Avocado

    November 5, 2018

    hands demonstrating how to safely remove a pit from an avocado

    Calling all avocado lovers - are you cutting your avocado wrong? We all eat avocados, we all love avocados, and at some point we have all cut an avocado. For years, I used the same cutting technique, starting at the top stem and making one long cut all the way around, giving me two avocado halves. Then came the tricky part - removing the pit! I would stab the avocado pit with the middle of my blade and somehow try to not slice my hand trying to dislodge it from my sharp blade. Does this sound familiar? What if I told you there was a better way to cut an avocado? I just learned a new avocado cutting technique that is safe, doesn't require a new kitchen gadget, and is only a slight modification from your current avocado cutting technique. Let me tell you all about it!

    How to Cut an Avocado:

    Follow these two easy step for the best, safest & quickest way to cut an avocado.

    Step 1 - Make two cuts from the top to the bottom and back around.

    Start with the top stem facing up and the bottom resting on the cutting board. Make one long cut from the top of the avocado down to the base and then back up again to the top where you started. Then, turn your avocado 90 degrees and make the same cut around, starting from the top. You should now have 4 even pieces.


    Step 2 - Remove the seed and peel back the outer skin.

    Now that the avocado has been cut into 4 pieces, you can easily remove the pit. You can take off the tough outer skin by either peeling back the skin or scoop it out with a spoon.


    Now that we've got our culinary technique down, let me take off my chef hat and put on my dietitian hat for a just a minute. Not only are avocados super tasty and versatile in the kitchen, they are also really healthy. Avocados are considered to be heart healthy because they are full of 'good' fats, like monounsaturated fats and polyunsaturated fats. These healthy fats work together to lower your cholesterol, which can help prevent strokes and heart disease. The fat in avocados also work to keep us fuller for longer after a meal, and help us absorb certain nutrients like vitamin A, D, E and K. Avocados are truly nutrient packed and we should always include them as part of a healthy diet. (Source 1, Source 2, Source 3).

    Now, go on and get your avocado on!


    What's your favorite avocado recipe? Did you find this avocado cutting technique as life changing as I did? Comment below, I would like to hear what you think!

    Chocolate Avocado Pudding

    October 29, 2018

    a hand holding a white bowl full of chocolate avocado pudding

    I don't typically dip into the world of vegan, dairy-free, gluten-free, nut-free, no bake, (you get the point) recipes. But when I do, you know there will be chocolate involved! This Chocolate Avocado Pudding is out of control, full of extra rich and deep chocolate flavor. The base of this chocolate pudding recipe is 100% avocado with some nice little mix-ins to sweeten the deal. Once you add in the cocoa powder and maple syrup, I promise you, no one will know the pudding base is avocado! Now, let's get Chocolate Avocado Pudding wasted.

    Chef's Tip: Removing the pit from an avocado can be a little dangerous depending on your method. I've always hit the pit with the middle of my knife, which easily pulls out the pit from the avocado half. The not so easy part is removing the pit which is now lodged into my knife! I recently tried a new avocado cutting technique, which is so easy and much safer. To safely and easily cut an avocado, you will make two long cuts around the entire avocado. Starting at the top, with the tip of your knife facing away and the handle closest to you, make one long cut from the top to the bottom, then coming back up to the top of the avocado. Starting back at the top of the avocado, turn the avocado 90º, then make the same cut around. You will end up with four pieces, which will allow you to easily and safely remove the pit from the flesh. To peel, gently pull back the hard skin, almost like a banana. Check out the images and video below for more details!

    This Chocolate Avocado Pudding might be one of the easiest recipes I've ever made. Just whip up the ingredients in a food processor and serve. I have not tried this recipe in a blender but if you do, let me know in the comments section how it turned out! The only semi-intensive (and I use that word lightly) part about this recipe is peeling and removing the pit from the avocado but thanks to my Chef's Tip and video above, it should be a breeze.


    Dietitian's Note: You might have seen an avocado's nutrition facts and thought, "Oh my gosh, avocados have so much fat!". I am here to tell you that not all fats are created equal and different fats act differently in our bodies. Yes, some fats are not so good but some are absolutely essential. Fats to avoid are trans fats and fats to limit are saturated fats, especially when coming from animal sources. The 'good fats' are unsaturated fats, which are seen on a nutrition label as monounsaturated and polyunsaturated fats. Avocados are a great source of these healthy unsaturated fats, which are linked to lowering your diabetes risk and stabilizing blood sugars, keeping your appetite in check, and protecting your heart. Avocados are also full of fiber which also help keep your blood sugars and appetite stable! Next time you see a nutrition label, take some time to identify which fats are in which foods, you might be surprised with what you find! (Source 1, Source 2)

    Shop my Chocolate Avocado Pudding Recipe Ingredients


    – Amazon Affiliate Links –

    Spice Islands Pure Vanilla Extract

    Kikkomon Less Sodium Soy Sauce

    365 Maple Syrup

    Virgin Coconut Oil

    Colavita Balsamic Vinegar

    Hershey's Unsweetened Cacao Powder 


    Print

    Chocolate Avocado Pudding

    a hand holding a white bowl full of chocolate avocado pudding
    Pin Recipe
    Print Recipe

    ★★★★★

    5 from 2 reviews

    This Chocolate Avocado Pudding is unbelievably indulgent! Thick, creamy, and shiny, this easy dessert can be whipped up in one minute for an easy guilt-free dessert. This is the ultimate vegan chocolate pudding recipe!

    • Author: Michele Sidorenkov, RDN
    • Prep Time: 4 minutes
    • Cook Time: 1 minute
    • Total Time: 5 minutes
    • Yield: 6 ounces 1x
    • Category: Dessert
    • Method: Blending
    • Cuisine: Vegan

    Ingredients

    Scale

    1 avocado, peeled and pitted

    5 teaspoons unsweetened 100% cacao powder

    4 tablespoons maple syrup

    1 tablespoon virgin coconut oil

    ⅓ teaspoon soy sauce, preferably low sodium

    ¼ teaspoon balsamic vinegar

    ¼ teaspoon vanilla extract

    pinch of salt

    Instructions

    1. Add all ingredients to a food processor and blend on low for one minute or until well combined. Serve as is or chilled and enjoy! Yes, this recipe is that easy.

    Notes

    1. If you are not using low-sodium soy sauce, skip the pinch of salt.
    2. If you need this recipe to be gluten free, you will need to use a gluten free soy sauce, like this one (Amazon affiliate link).
    3. You can substitute the virgin coconut oil with regular coconut oil (also known as refined coconut oil). Just know that the virgin coconut oil provides flavor to the recipe and swapping it out might make the avocado flavor more pronounced, changing the overall recipe flavor.
    4. This recipe can be made ahead and refrigerated. In the refrigerator, the Chocolate Avocado Pudding will harden up a little because coconut oil solidifies in cooler temperatures.

    Nutrition

    • Serving Size: 3 ounces
    • Calories: 303
    • Sugar: 24 g
    • Sodium: 87 mg
    • Fat: 18 g
    • Saturated Fat: 7.5 g
    • Unsaturated Fat: 9 g
    • Trans Fat: 0 g
    • Carbohydrates: 36 g
    • Fiber: 5 g
    • Protein: 1 g
    • Cholesterol: 0 mg

    Keywords: vegan pudding, avocado pudding, healthy chocolate pudding

    Did you make this recipe?

    Tag @mymillennialkitchen on Instagram or leave a comment and rating below!

    This Chocolate Avocado Pudding recipe was inspired by San Francisco's Avocado Con. To see everything I ate at this avocado food festival (including a tempura fried avocado and vegan avocado cookie dough), check out my post here!

    Did you make this recipe? Love my recipe videos? Have any questions? Let me know in the comments section below, I would love to hear from you!

    San Francisco's Avocado Con

    October 22, 2018

    A food festival dedicated entirely to avocados?! You know I'm in. A few weeks ago Mark and I were in San Francisco with only one thing planned for our Sunday afternoon, Avocado Con! 20 food vendors, countless avocados, and as many bites and bits as I could eat. Our strategy was to order the most unique and exciting dishes, with each vendor coming up with their own avocado creation. At Avocado Con, there was guacamole, poke bowls, and other familiar avocado dishes but I really wanted to find the one-of-a-kind avocado dishes that you can't find anywhere else. And we came to the right place because I found some of the best avocado dishes in San Francisco!

    I started my avocado exploration with Jackrabbit's tempura fried avocado topped with 'firecracker' spicy aioli, fried shallots, and cilantro. It was heaven. Everything you would expect a deep friend avocado to be and the aioli setting it over the edge. The dish had little crunch, with a lot of full, creamy flavors. How they were able to fry an avocado and still keep it vibrant green is beyond me. Witchcraft or culinary magic? Whatever the answer, it was the perfect first dish!

    Our next Avocado Con dish was from DOUGHP with a thick, sticky, and indulgent avocadough. Yes, vegan avocado cookie dough! After two spoonfuls, I was almost knocked out with its richness. In this dish, the avocado played a different role than other festival dishes. The avocado was used more as the vegan cookie dough binder than its flavor. Clever!


    This next dish from Lobo's Ice Cream was my favorite, an avocado ice cream with all the toppings! The ice cream was so creamy and sweet with hints of avocado. I was a little afraid of the toppings but agreed to let them give my ice cream the works! Lobo's topped my avocado ice cream with a squeeze of lime, a sweet and spicy red sauce, and a dash of Tajin. All the flavors together took this avocado ice cream to another level!


    Our final festival bite was an avocado empinada by Nucha Empinada. It was flakey, doughy, and stuffed with avocado, tomatoes, and queso fresco. It was exactly what I needed to cut all the sweetness from the last two dishes.

    This avocado lover had a blast the San Francisco Avocado Con! Ending my festival with two savory and two sweet avocado dishes, I would say I covered all the bases. So many bites surprised me and I would happily try everything again, and again, and again. Especially that avocado ice cream, it was avocado-licious!


    October Happenings - Recipe Videos, Washington, D.C. & Broken Knees

    October 18, 2018

    poster of colorful pumpkins with the words 'October Happenings' over it with a white boarder outline

    Hey, it's me! The lady behind the computer screen. Hello, how are you?

    So much is happening on my side of the computer screen that I thought it would be fun to do some kind of check-in, maybe turning this into a monthly thing. In between blog posts and recipes, I would love to fill you in on upcoming trips, monthly triumphs, and whatever else comes to mind. I really liked writing about my recent blogging highs and lows and thought it would be nice to keep that conversation going. I know it's already mid October (still trying to figure out where August and September went!), a little late for an October check-in but i'm going for it. Actually, this is probably the best time to sit down and chat because October was off to a running start and there is still so much more excitement to come! Now, let's get to it.


    Recipe Videos

    I feel like I actually want to cry. I made my first recipe video, EVER. I feel like skipping down the street and screaming from the roof tops that I actually made a recipe video!! For the last year and a half I feared videos because even the thought of putting one together was overwhelming. I was still learning photography, I didn't have an overhead tripod or a video camera, I don't know the video editing software.. and my list of fears went on. My daily blog tasks felt so overwhelming that there was no way I could squeeze in anything new.

    Then, one day I pulled the trigger and just went for it! The kicker is that I still don't have a video camera. I made my recipe video in my own way, using techniques that I was already familiar with. I was able how to figure out how to take a series of photos and stack the images together to make a 'video'. I love how it turned out and really like its unique look! Ripping off the video band aid was difficult but I am so glad I took the plunge! Check out my first recipe video blog post here.

    Washington, D.C.

    Every year I go to a really big nutrition conference for Registered Dietitian Nutritionists. The conference is called the Food and Nutrition Conference and Expo (FNCE) and this year it will be in Washington, D.C. - where my dietitian readers at? FNCE is three-ish days of non-stop lectures and educational sessions. That might sound a little stale but I honestly look forward to FNCE every year and have so much fun. FNCE keeps me up to date on the latest nutrition research, teaches me about new emerging trends, and allows me to network with other dietitians. I'm going to be honest, every time I go it feels like a big dietitian pep rally!

    For this conference I planned some exciting D.C. excursions, including a White House Tour!! Yes, the White House! Politics aside, I am so excited to be able to go past the gates and walk through such an important, historic, and prestigious building. The tour request was submitted to my Arizona Representative 3 months ago and I just found out last week it was approved. If they have a gift shop, you know I won't come out of there empty handed! White House tea towel, anyone? Before the conference starts I also have a few fun restaurant reservations, food tours, and sightseeing excursions planned. Wish me luck that I don't freeze, I know it's a lot colder in D.C. than AZ!

    Broken Knees

    When I call them broken knees, I don't mean literally my knees are broken. However, I am excited to report that after a year of chronic knee pain, I am on the mend! Last October I went to one too many yoga classes and aggravated some old high school knee cartilage injuries. It got worse and worse, then after physical therapy and some semi-successful steroid injections, I'm getting a new kind of injection. I am actually really excited about this one, it's an injection that will coat and protect my damaged cartilage to cushion and prevent any further damage. Mark and I joke that I will be like a bionic woman and that I brought a whole new meaning to the word gellin'. I am really anxious about getting the shot in a few weeks but I feel so fortunate that we live in a time where these kinds of treatments are available! Maybe when I write my next Happenings post, I’ll have a knee update.


    And now I'm off to D.C! Do you like these kinds of posts? Should I do monthly updates more often? Let me know in the comments section below. I hope everyone has a great October!

    Sun Dried Tomato & Parmesan Polenta with Crispy Chickpeas

    October 16, 2018

    There is something magical about a quick dish that is loaded with bold, craveable flavors and is around 500 calories. Oh, and it's meatless! What makes this dish so delicious? My guess is the Parmesan polenta with tiny sun dried tomato flavor bombs. Or maybe it's the savory thyme mushrooms with a 'meaty' sauce. Actually, it's probably the crispy chickpeas giving this dish the perfect crunch. Let's face it, after making this dish a few times, every element of this dish is my favorite!

    Psst - this dish is so good, even a meat lover would swoon. Pass it on!

    This easy entrée is broken into three parts - but don't worry, everything is super simple. The Parmesan polenta can be made in about 5 minutes with minimal attention and set aside until the other elements are complete. Then, a quick sauté of the shallots, mushrooms, and thyme then using the same pan, crisp the chickpeas. Voila! Dinner ready in 25 minutes.

    If you want a little more info on exactly how this recipe is made, I put together my first recipe video ever (!!) which I added to my recipe card below.

    Dietitian's Note: Protein is made up of different amino acids, with differing amounts and types depending on the food. Our bodies need complete proteins, which are found in food items with all nine amino acids present. Soy and animal proteins have all nine amino acids and are considered complete proteins. Vegetarian ingredients on the other hand have different amino acid amounts, which never have all nine amino acids your body needs. (source)

    An easy way to solve this vegetarian protein problem is by combining different foods with different amino acids into one meal. After adding up all the sides, ingredients, and toppings, you may have all nine amino acids on your plate! Nifty trick, huh? You will have to do some meal planning research beforehand and I have found this website to be extremely helpful when calculating which amino acids are in which foods. The good news is that this recipe has all nine amino acids and is a compete protein meal! So, no need to research for this dish, I've got you covered.

    Wine Pairing: While this dish touts some rich flavors, there is a lightness coming from the chickpeas and acidic sun dried tomatoes. Typically a heavier entrée would pair well with a red wine but I am pairing this dish with a Pinot Gris from Alsace, France. A French Pinot Gris can hold its own, going toe-to-toe with a meatless entrée and pairing well with this dish's rich Parmesan cheese and mushrooms. A French Pinot Gris differs from an Italian Pinot Grigio because of the seasons and elevations. The French Pinot Gris has more of a spicier and full bodied weight to the glass, which pairs perfectly with the dish's stronger flavors. Not feeling white wines right now? This dish would also pair well with a light Pinot Noir, which compliments the 'meatier' flavors in this vegetarian dish.

    SHOP My Recipe Ingredients


    – Amazon Affiliate Links –

    Bob's Red Mill Polenta

    Sun Dried Tomatoes in Olive Oil

    California Olive Ranch Olive Oil

    Pacific Low-Sodium Vegetable Broth

    Bush's Best Organic Garbanzo Beans


    Print

    Sun Dried Tomato and Parmesan Polenta with Crispy Chickpeas

    Pin Recipe
    Print Recipe

    ★★★★★

    5 from 4 reviews

    This vegetarian Sun Dried Tomato and Parmesan Polenta with Crispy Chickpeas entrée hits on all levels - an easy and healthy dinner dish that is a little creamy, a little zingy, and a little crunchy. This date night dinner is easy to prepare, from stove top to dinner table in 25 minutes.

    • Author: Michele Sidorenkov, RDN
    • Prep Time: 5
    • Cook Time: 20
    • Total Time: 25 minutes
    • Yield: 2 entrées 1x
    • Category: Dinner
    • Method: Cook
    • Cuisine: Italian

    Ingredients

    Units Scale

    3 cups low-sodium vegetable broth

    1 cup polenta (also seen as corn grits in the grocery store)

    3 tablespoons finely chopped oil packed sun dried tomatoes, divided

    ⅓ teaspoon salt, divided

    ½ cup freshly grated Parmesan

    2 tablespoons olive oil, divided

    1 medium shallot, diced

    8 ounces sliced mushrooms

    1 tablespoon fresh thyme

    ½ a can of chickpeas (¾ cup), rinsed and dried

    Instructions

    1. Bring vegetable broth to a boil. Add polenta, 2 tablespoons of sun dried tomatoes, and ¼ teaspoon salt, and cook according to the polenta package instructions (note 1). When the polenta is done, take off the heat and stir in parmesan until it has been completely incorporated. Cover to keep warm and set aside.
    2. In a sauté pan on medium heat, add 1 tablespoon of olive oil and sauté shallots until translucent (about 5 minutes). Add mushrooms, remaining salt, and thyme to the pan and continue cooking for 5-10 minutes or until the mushrooms are soft and tender, stirring occasionally. When the mushrooms are ready, transfer the mushrooms and any pan juices to a bowl, then cover, set aside, and keep warm (note 2).
    3. Wipe the same sauté pan clean with a paper towel. Increase the heat to medium high and add 1 tablespoon of olive oil to the pan. When the pan has heated up, add the chickpeas and give the pan a shake to make sure all the chickpeas are in contact with the pan, not stacked on top of each other. When letting the chickpeas crisp up, do not toss the pan or stir until they have browned, about 2-4 minutes each side (note 3). After crisping the chickpeas, stir in the remaining sun dried tomatoes during the last minute of cooking. If the chickpeas have browned but don't seem very crispy, take them out of the pan to cool will help solidify the crunch.
    4. Assemble your plate - add polenta to your plate, spreading it out with the back of your spoon. Next spoon the mushrooms over your polenta base, drizzling any remaining mushroom juice over the polenta. Lastly, sprinkle the crispy chickpeas over the top and enjoy!

    Notes

    Note 1: Basic instructions for cooking polenta - In a pot, bring your liquid to a boil, then reduce heat to low and stir in polenta. Let cook uncovered for about 5 minutes, stirring occasionally. Then take off the heat, cover, and let sit for a few more minutes to allow the polenta to absorb the remaining moisture.

    Note 2: I usually put my mushrooms in the microwave to stay warm. The small, closed space keeps the dish warm and protects from any cooling from drafts.

    Note 3: When the chickpeas get hot, they may start popping! I had a few shoot across my kitchen, so if you have some kind of mesh splatter guard I would add it for this step. I wouldn't use a lid for this step because that will keep moisture in, preventing the chickpeas from crisping and browning. I personally don't have a mesh platter guard, so I just added the escaped chickpeas back into the pans.

    Note 4: I recommend pairing this recipe with a French Pinot Gris.

    Nutrition

    • Serving Size: 1 serving
    • Calories: 536
    • Sugar: 7 g
    • Sodium: 1368 mg
    • Fat: 21.5 g
    • Saturated Fat: 7 g
    • Unsaturated Fat: 13 g
    • Trans Fat: 0 g
    • Carbohydrates: 62 g
    • Fiber: 7 g
    • Protein: 25 g
    • Cholesterol: 24 mg

    Keywords: vegetarian dinner, easy and healthy polenta recipe

    Did you make this recipe?

    Tag @mymillennialkitchen on Instagram or leave a comment and rating below!

    How to Eat an Oyster

    October 11, 2018

    oysters in the half shell on ice

    Knowing how to eat an oyster makes all the difference in your oyster eating experience. Yes, you can just chew them and slurp it down but to truly have an oyster euphoric experience, there is a formal 4-step procedure. I absolutely love oysters and I've used these same oyster eating steps every time. How you eat an oyster can truly change your oyster experience and help you notice the small nuance flavors you might have missed before.

    oysters in the half shell on ice

    Plate of oysters on the half shell waiting at a restaurant window

    How to Eat an Oyster

    1. Smell – the oyster should have a briny and fresh ocean water smell.
    2. Sip – typically an oyster served in its shell will have a little bit of seawater (brine) left inside. Sipping on the brine is suggested to cleanse the palate and prep your taste buds.
    3. Eat – it was highly suggested that you chew through your oyster (which I agree is best/delicious) so you can get the ‘flavor of the sea’. You also get to taste the oyster's subtle sweetness.
    4. Pair – with a crisp, light glass of Sauvignon Blanc.

    Bonus: Oyster Facts

    • Fact: Raw oysters are very safe and have stricter standards than other proteins. The bar for raw shellfish is set so high, don't even think twice when it's on the menu!
    • Myth: Only eat oysters in months that end in ‘r’. Have you heard this saying before? Back in the day, this used to be the rule for identifying warm weathered months, which was not ideal for oyster eating. Today, oyster farming practices have changes so much that we no longer have to check the calendar if we want to enjoy a plate of oysters.
    • A single oyster can clean up to 120 liters of water a day, helping to keep the ecosystem tidy and in balance.


    My absolute oyster is the kumamoto, which is mild and briny. If you haven't tried them, order them next time! And now that you know how to eat an oyster, you can use these steps to really take these oysters to their highest potential. Want to switch up your oyster order? Try a large barbecued oyster, like the ones I had at Hog Island Oyster Co., topped with chipotle butter before being put on the grill.

    Which oyster is your favorite?

    This article I originally wrote in January of 2016, which I have since updated and re-published.

    Hog Island Oyster Co.

    October 8, 2018

    girl outside at hog island oyster co. with plates of food in front of her

    A venture out to Hog Island Oyster Co. in Marshall needs to be on your Northern California road trip itinerary. Located right on Highway 1, tucked behind golden rolling hills, overlooking Tomales Bay, this little oyster shack has all the elements of a perfect afternoon. With a glass of Sauvignon blanc in hand and a tray of oysters on its way, Mark and I snagged a picnic table at The Boat Oyster Bar and settled in.


    From the sharable family-style dishes to the wine glass tumblers, everything at Hog Island Oyster Co. has elements of a fancy rustic picnic. Their food matches the scene, which are world-class oysters served at picnic tables on the water. Not wanting to miss a single dish, we ordered up a storm! The Boat Oyster Bar menu is small but spectacular, with the perfect selection of elevated picnic dishes. We ordered a charcuterie board with prosciutto, soppressata (basically a thin salmi), olive oil crackers, and a dollop of tangy whole grain mustard. The cheese plate also caught our eye with quite a few soft and hard local cheeses and was accompanied by crunchy fruit and nut crackers.


    Now, what Mark and I came here for - Hog Island Oysters! We ordered oysters two ways, raw and barbecued. I love raw oysters and today their Hog Island Kumamotos were on the menu. Kumamoto oysters are my absolute favorite oyster because they are small, briny, mild, and almost sweet in flavor. I have a certain oyster eating technique that I wrote about in this article which helps elevate my oyster eating experience! Our dozen oyster order came with lemon slices their 'Hog Wash' house cilantro and jalapeño mignonette sauce. We also ordered barbecued oysters, which were larger in size and cooked in a smoky chipotle butter. The oyster platters were incredible and I was in oyster heaven. I could eat a whole tray of raw oysters in record time, but I chose to slow it down and take a more leisurely approach to my oyster eating. The view, the wine, my hot date .. what's the rush?


    The Boat Oyster Bar is not only an awesome place to hang out for the afternoon but their amazing oysters are the freshest catch you can get. Hog Island Oyster Co.'s famous oysters are farmed in the waters right in front of our picnic tables! Throughout the day, bags of oysters are brought to shore, scrubbed, then either sent off to restaurants or walked over to The Boat Oyster Bar for lunch. These oysters are literally as fresh as it gets, with the shore and oyster sorting happening literally within feet from our table!


    After another round of wine, we explored the rest of the farm. The oyster farm is pretty small with the restaurant, oyster cleaning station, and shop all within feet from each other. They have a pick-up window where you can bring bags of oysters home or buy shucking tools straight from the source. I wish we had signed up for a tour, I would have loved to know more about their farming practices and operations. Maybe next time!


    Hog Island Oyster Co. in Marshall is the best little spot to get swept away for the afternoon. Bring good company, order everything, and stay awhile. You might also want to bring a hat and sunscreen, haha. When heading to Hog Island Oyster Co., the destination is worth the trek .. the juice is worth the squeeze.. or the oyster is worth the shuck.. you get the point. You have to try this place!


    If you do end up going out to the Marshall Hog Island Oyster Co. location, know that there is no cell service (aka ride share apps will not work!), and you need a reservation. It's a popular place and chances of a walk-in reservation opening are slim. But remember - the oyster is worth the shuck!

    • « Go to Previous Page
    • Go to page 1
    • Go to page 2
    • Go to page 3
    • Go to page 4
    • Go to page 5
    • Go to page 6
    • Interim pages omitted …
    • Go to page 17
    • Go to Next Page »

    Footer

    ↑ back to top

    About

    Media Mentions

    Contact Me

    Sign Up for My Newsletter

    Email Me

    Resources

    Privacy Policy

    Disclaimer

    Terms of Use

    Advice for Nutrition Students

    Some products linked or discount codes provided throughout this site are affiliate programs. I receive a small commission if you purchase any items through the links or codes I provide.

    Copyright © 2022 Mymillennialkitchen